Showing posts with label art club. Show all posts

Monday, December 7, 2015

How to make hanging globes

Materials:
Cereal Boxes
Scissors
Hot Glue Gun
Hot Glue Sticks
Clear Plastic Drinking Cups

Doilies
Miniature Figurines (Walmart or local dollar store)
Miniature Bells


© Live Art, Breathe Art 2015
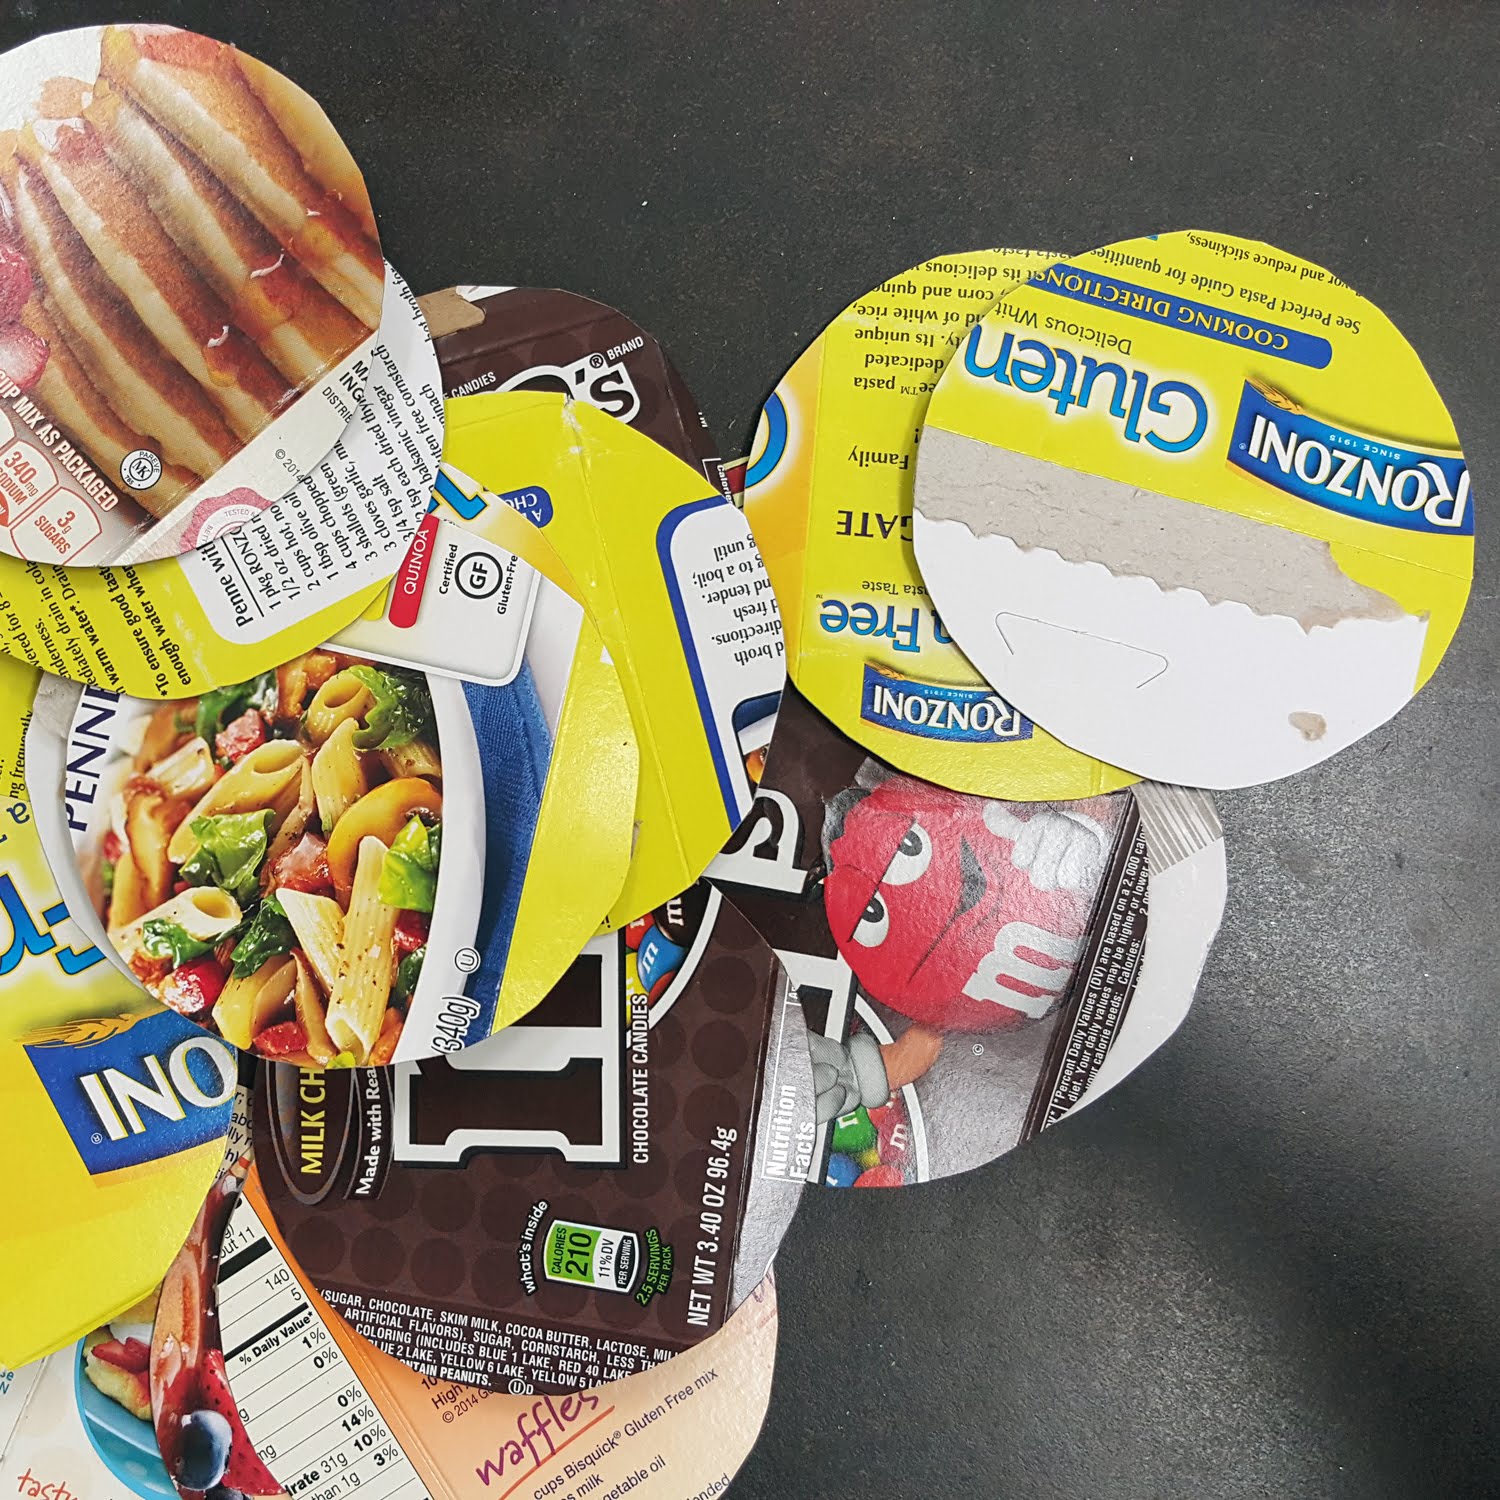
Step 1: Trace your clear plastic cup onto a cereal box or other type of cardboard. We used M&M, Pasta, and Bisquick Boxes.
© Live Art, Breathe Art 2015
Step 2: Cut out your circle(s)


© 
Live Art, Breathe Art 2015


© Live Art, Breathe Art 2015
Step 3: Glue doily to cardboard circle


© Live Art, Breathe Art 2015
Step 4: Use hot glue to attach a miniature figurine onto the center of your doily that has been glued to a cardboard circle.

© Live Art, Breathe Art 2015

Step 5: Use scissors or other sharp object to make a small hole in the center of the clear cup.

© Live Art, Breathe Art 2015
Step 6: String a bell through hole of the cup and tie a knot at the top.
© Live Art, Breathe Art 2015
Step 7: Add hot glue to the rim of the cup


© Live Art, Breathe Art 2015

Step 8: Attach cardboard with miniature figurine to cup. 

© Live Art, Breathe Art 2015
Step 8: Flip globe over and use hot glue to attach a pipe cleaner to the rim of the glass


© Live Art, Breathe Art 2015
Congratulations, you are done! Now you can gift these to your family, friends, and co-workers! 


Student Work Examples: 
JMS Art Club

© Live Art, Breathe Art 2015

© Live Art, Breathe Art 2015

© Live Art, Breathe Art 2015

© Live Art, Breathe Art 2015

Thursday, December 3, 2015

How to Make Snow Globes

This month during our Art Club meeting, we made some hanging globes and snow globes using easy to find materials. I will create another post on how to make the hanging globes.  

How to make Snow Globes:

Materials: 
Cereal Boxes
Snow (Mixture of Fine Salt and Extra Fine Glitter)
Scissors

Hot Glue Gun
Hot Glue Sticks
Clear Plastic Drinking Cups
Doilies

Miniature figurines (Walmart or local dollar store)


© Live Art, Breathe Art 2015
Step 1: Trace your clear plastic drinking cup onto a cereal box or other type of thin cardboard. We used M&M , Pasta, and Bisquick boxes. 


© Live Art, Breathe Art 2015

Step 2: Cut out your circle(s)
© Live Art, Breathe Art 2015

Step 3: Glue doily to cardboard circle
© Live Art, Breathe Art 2015

Step 4: Use Hot Glue to attach a miniature figurine onto the center of your doily that has been glued to a cardboard circle. 
© Live Art, Breathe Art 2015
Step 5: Pour salt and extra fine glitter into your clear plastic cup. 
© Live Art, Breathe Art 2015
Step 6: Add hot glue to the rim of the cup.


© Live Art, Breathe Art 2015

 Step 7: Attach cardboard with miniature figurine to cup. 

© Live Art, Breathe Art 2015
Step 8: Flip snow globe over and attach pipe cleaner to the rim of the glass. 


© Live Art, Breathe Art 2015
Congratulations, you are done! Now you can gift these to your family, friends, co-workers! 


Student Work Examples: 
JMS Art Club
© Live Art, Breathe Art 2015

© Live Art, Breathe Art 2015


Friday, November 13, 2015

Re-purposed Dried up Acrylic paint & Laminate Tile Samples

Ever wonder what to do with dried up Acrylic paint? Well here's an idea, scoop out your old paint from the tray(s) cut it, roll it up, and wrap jewelry wire around it. You could also add beads for a touch more color. Voila! You now have some fun & unique charms for a bracelet, necklace, or a little something for a mixed media collage.
Re-purposed Dried Acrylic Paint
© Live Art, Breathe Art
Last year, Spare Parts donated a box full of Laminate Tile Samples (3.5"x5")  to my art class and I had no clue what to do with them.  This year I was determined to use them.  So, in September I pulled them out and decided to introduce mixed media collage to my Art Club kids.

Step 1: Choose a Laminate Tile Sample

Laminate Tile Samples (3.5"x5")
© Live Art, Breathe Art 
Step 2: Pull out all the art scraps you have stored. 
Cardboard, knick knacks, scrap paper, magazine paper, old photos, fabric samples, etc. I keep a box of unwanted items for occasions such as this. 
Scraps of "trash" (unwanted items) or left over stuff from previous projects
© Live Art, Breathe Art 
Step 3: Let your Imagination Fly! 

Step 4: Glue a magnet to the back and hang it in your locker, or on your refrigerator at home. 


Examples of Student Work: 
© Live Art, Breathe Art  2015

© Live Art, Breathe Art  2015

© Live Art, Breathe Art  2015

© Live Art, Breathe Art  2015

© Live Art, Breathe Art  2015


Wednesday, September 16, 2015

Art Club makes Tote Bags from Old Tees!


This summer I attended Texas Public Radio's Art of Recycling event where Spare Parts  was teaching the public how to re-purpose old tees. I loved this project so much that I decided it would be the perfect recycling project to kick off the first Art Club meeting of the 2015-2016 school year!  

Art club spent the afternoon making cute tote bags from old tees that would have been otherwise discarded and we had a blast! I was excited to have a full classroom of over 26 students that filled the room with chatter, laughter, and best of all recycling! 

© Live Art, Breathe Art 2015
You too can make your own tote bag by following the tutorial below: